miscellaneous tips, advice, and cautions
-
john_woodward
- 1

- Posts: 32
- Joined: Thu Sep 17, 2009 9:00 am
- Full Name: john woodward
- Location: san diego, ca, us
Re: miscellaneous tips, advice, and cautions
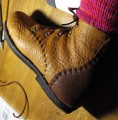
Greetings, I was curious about the Hermes purchase of John Lobb, and what effect it might have on the great shoemaker.So when a someone walked into the shop with a nearly a new pair in a box I was excited to see them. He told me had only had them a couple weeks( $1600) and he had scuffed up the toes something terrible and wanted to know if I could do anything. I was disappointed to say the least. This model is the one piece cut from their video..The first thing that stood out to me was the sole is not stitched,and cut to short around the toe.... but they did get creative with the welt.Let me know if you would like to see some pics.
-
kieran_ionescu
- 1
- Posts: 45
- Joined: Thu Mar 12, 2009 9:00 am
- Full Name: Kieran Ionescu
- Been Liked: 1 time
Re: miscellaneous tips, advice, and cautions
I would love to see how they got "creative" with the welt.
Respectfully,
Kieran
Respectfully,
Kieran
-
lancepryor
- 7

- Posts: 662
- Joined: Wed Mar 31, 2004 6:42 am
- Full Name: lance pryor
- Been Liked: 6 times
Re: miscellaneous tips, advice, and cautions
John:
I have to believe the sole is stitched -- they hide the sole stitching in a covered channel on the sole side. I believe virtually all, if not all, John Lobb shoes are goodyear welted and have a stitched outsole.
Furthermore, be aware that the shoe you have seen is from the John Lobb ready-to-wear line, made in a shoe factory in Northampton, England. While these are among the best RTW shoes available, they do not really compare with the bespoke Lobb shoes, as they are not made in the same way.
Lobb bespoke shoes are made by 2 separate companies in 2 locations -- the John Lobb business owned by Hermes makes bespoke shoes in Paris, in addition to the John Lobb RTW shoes referenced above. The Lobb (Paris) operation is considered to make some of the finest bespoke shoes in the world (and priced accordingly -- north of $5000 per pair if I'm not mistaken).
The Lobb family still owns the Lobb St. James (London) operation, which only makes bespoke footwear. Probably still the most famous name in the trade, prices around $4000 per pair. Some have criticized their last shapes over the recent past.
Not to say the pair you saw wasn't a disappointment. Even at 'only' $1600 a pair, these shoes should be almost above reproach, which doesn't seem to be the case in this instance.
Lance
-
john_woodward
- 1
- Posts: 32
- Joined: Thu Sep 17, 2009 9:00 am
- Full Name: john woodward
- Location: san diego, ca, us
Re: miscellaneous tips, advice, and cautions
Lance, Thank you for your comments.You may be right. The customer took the shoes with him so I can't examine them further. I only have my initial look and a few photos .Photos are always inconclusive as far as I'm concerned.The black ink arround the sole is 1/16th of an inch for comparison...welt.....SHOE....toe.
You do not have the required permissions to view the files attached to this post.
-
dearbone

- 8

- Posts: 1032
- Joined: Fri Oct 12, 2007 12:23 pm
- Full Name: Nasser Vies
- Location: Toronto, Ontario, Canada
- Been Liked: 3 times
Re: miscellaneous tips, advice, and cautions
John,
The line around the welt that cut the fudge wheel marking in half is a lip cut on the welt to bury the thread,i made few and i think,that's what is being done here.
Nasser
The line around the welt that cut the fudge wheel marking in half is a lip cut on the welt to bury the thread,i made few and i think,that's what is being done here.
Nasser
-
romango

- 8
- Posts: 854
- Joined: Wed Apr 18, 2007 1:40 pm
- Full Name: Rick Roman
- Location: Eugene, Oregon, USA
- Been Liked: 8 times
- Contact:
Re: miscellaneous tips, advice, and cautions
What types of shortcuts do bootmakers employ when making dress wellington fitters?
I'm finding it almost as much work making the uppers as it would be to do the real thing.
Some obvious things are leaving off the top piping and, of course, glued not inseamed or outseamed.
Any other tips?
I'm finding it almost as much work making the uppers as it would be to do the real thing.
Some obvious things are leaving off the top piping and, of course, glued not inseamed or outseamed.
Any other tips?
You do not have the required permissions to view the files attached to this post.
-
paul
- 8
- Posts: 1038
- Joined: Tue Mar 08, 2005 10:00 am
- Full Name: Paul Krause
- Location: Prescott, Arizona, USA
- Been Liked: 14 times
- Contact:
Re: miscellaneous tips, advice, and cautions
Rick,
I'm in the muddl...I mean, middle, of fitters myself right now.
I've been making them for a few years now, and boy, is there a pile of discards over there and there and there.
The point is I've been thinking of recycling them. And I just tried it with my first two. One is waiting for a couple of weeks before the customer is back in Prescott. The other is my current kettle of fish, the flat footed imprints I shared a few days ago. I'd say the jury is still out about whether this was a very good idea. But I'm remaking a new pair for him right now. (When I'm not sitting here, of course.)
I do mine rough out so the customer can slide in w/o a liner. I sometimes, do just a little 8" shorty, or others the whole desired heigth and top line, sin piping.
I've also punched 7/8" holes, sometimes lined with an extra disk as support, all rather than pulls.
Regarding liners, actually I think of them as "outers", since it's all inside out,
It just needs to be above the pass line. DW showed that somewhere on here awile back. It helps when the remnant you're using for your tops is a little soft. That "outer" will keep the boot from strecthcing too much and not giving you a true read. Good skiving practice here.
And I also stitch just one row all around the quarters, counters and counter covers. That moves it fwd some.
The only other thing, and I've thunk this on my own, is regarding the veg parts, the insoles and counters in particular, because I don't use toe boxes on fitters.
It is such a production with counters especially, and use of good leather that can be used better elsewhere. I've been making these parts out of skirting leather. And why not? A fitter is just "a test of the negaive space you've created for the foot". It doesn't need to go anywhere.
I buy skirting sides to make Buckless Belt, and the remnant I use the bellies for fitter counters and insoles. It helps expedite it all for me sometimes.
Hope any of this is of value.
Corrections and other prespectives welcome.
Back to the bench,
Paul
-
paul
- 8
- Posts: 1038
- Joined: Tue Mar 08, 2005 10:00 am
- Full Name: Paul Krause
- Location: Prescott, Arizona, USA
- Been Liked: 14 times
- Contact:
Re: miscellaneous tips, advice, and cautions
Oh, And I also use staples for the side seam, often w/o piping. And I just staple up close to the throat line junction, rather than tie off the three holes like we'de do to a finished boot.
-
dw

- Seanchaidh
- Posts: 5830
- Joined: Wed Jan 01, 1997 10:00 am
- Full Name: DWFII
- Location: Redmond, OR
- Has Liked: 204 times
- Been Liked: 125 times
- Contact:
Re: miscellaneous tips, advice, and cautions
I build FMs with the grain side...in on both the tops and the vamps. I use a "strip" welt at the side seams. I use a full thickness heel stiffener but make it only as deep as the insole (no lasting allowance). I use no interior lining but as Paul suggested most of the time I exterior line the tops for roughly six inches from the throatline upward.
I usually sew the side seam as I would on a finish boot.
I do not channel the insole.
After lasting I hot melt the uppers to the insole (Yes or Hirschkleber would work too...I just happened to have a glue gun when I started doing this all those years ago) and then add a shank and AP a rough rubber outsole to the boot.
Add a heel and pull the last.
This can be done fairly quickly...in less than a day through lasting...although I've never timed it.
Some components can be recovered or reused. Heels stiffeners can be pulled and split for build-ups on lasts. Same for insoles, if a second fitting makes the initial insole too small. But it's all scrap anyway. Getting one usage out of it is gravy compared to throwing it away or storing it for years and years.
I have thought about using fiberboard or leatherboard for the insoles of fitter's models...good insole shoulder is getting too hard to find....but I don't know where to purchase either.
Tight Stitches
DWFII--HCC Member
-
athan_chilton
- 4

- Posts: 163
- Joined: Sun May 17, 2009 7:03 am
- Full Name: Athan Chilton
- Location: Urbana, IL, USA
Re: miscellaneous tips, advice, and cautions
DW, do you mean Texon insole board? I think MacPherson's Leather in Seattle might have it. Georgene of Shoedo on this forum has lightweight Texon, suitable for women's wear insole.
-
dw
- Seanchaidh
- Posts: 5830
- Joined: Wed Jan 01, 1997 10:00 am
- Full Name: DWFII
- Location: Redmond, OR
- Has Liked: 204 times
- Been Liked: 125 times
- Contact:
Re: miscellaneous tips, advice, and cautions
I don't know...I've never had any recourse to these kinds of materials before. But I would really prefer leatherboard over fiberboard or some other compound. At least the leatherboard is utilizing scrap leather
I think Texon is fiberboard or pressed paper...
Tight Stitches
DWFII--HCC Member
I think Texon is fiberboard or pressed paper...
Tight Stitches
DWFII--HCC Member
-
romango
- 8
- Posts: 854
- Joined: Wed Apr 18, 2007 1:40 pm
- Full Name: Rick Roman
- Location: Eugene, Oregon, USA
- Been Liked: 8 times
- Contact:
Re: miscellaneous tips, advice, and cautions
Thanks guys.
Great info. Lots of good stuff to try.
Paul, what kind of stapler do you use?
- Rick
Great info. Lots of good stuff to try.
Paul, what kind of stapler do you use?
- Rick
-
big_larry
- 4
- Posts: 159
- Joined: Sat Aug 05, 2006 9:00 am
- Full Name: Larry A. Peterson
- Location: Ephraim, Utah, USA
Re: miscellaneous tips, advice, and cautions
Please let me ask a question at this point.
I am a "bit in the dark" about the fitter for the full Wellington. What would be the problem just using the Dress Wellington fitter???
Once the pass line is established for the boot, wouldn't every thing else be the same?
Thank you for tolerating my being "slow."
Larry Peterson
I am a "bit in the dark" about the fitter for the full Wellington. What would be the problem just using the Dress Wellington fitter???
Once the pass line is established for the boot, wouldn't every thing else be the same?
Thank you for tolerating my being "slow."
Larry Peterson
-
dw
- Seanchaidh
- Posts: 5830
- Joined: Wed Jan 01, 1997 10:00 am
- Full Name: DWFII
- Location: Redmond, OR
- Has Liked: 204 times
- Been Liked: 125 times
- Contact:
Re: miscellaneous tips, advice, and cautions
Larry,
You're right...I wouldn't go to the trouble to make a full wellington fitter. I just use a regular dress wellington fitter.
Tight Stitches
DWFII--HCC Member
You're right...I wouldn't go to the trouble to make a full wellington fitter. I just use a regular dress wellington fitter.
Tight Stitches
DWFII--HCC Member
-
chuck_deats
Re: miscellaneous tips, advice, and cautions
Larry,
DW is right unless you have some ripped FW crimped blockers. Sew a patch on the outside and use for fitters. Guess how I know this wil work.
DW is right unless you have some ripped FW crimped blockers. Sew a patch on the outside and use for fitters. Guess how I know this wil work.
-
paul
- 8
- Posts: 1038
- Joined: Tue Mar 08, 2005 10:00 am
- Full Name: Paul Krause
- Location: Prescott, Arizona, USA
- Been Liked: 14 times
- Contact:
Re: miscellaneous tips, advice, and cautions
Rick,
I use an Arrow #P22 stapler with 5/16" staples.
But just so as to close it until I get it stitched.
I thought I ought to come back and clarify that, sorry.
I have used a strip side welt occasionaly too, and I say it certainly looks better. But when I put plastic trees in my wet tops tops after I've lasted the boots, they shape up well enough to tell me what I want to see when I'm using 5oz. chap leather for my tops. Care still needs to be taken with the inside if the seam of course, so the customer doesn't have that to complain about. But stapling gets you ready to stitch the boots closed w/o much fuss.
Larry, On my first pair of full cuts, I did a dress welly style fitter. We use the same top patterns with DW's method of patterning and construction anyway, so it's a logical conclusion.
Be sure to post your boots when you get them done.
Looking forward to yours too Rick.
back to the bench,
Paul
-
big_larry
- 4
- Posts: 159
- Joined: Sat Aug 05, 2006 9:00 am
- Full Name: Larry A. Peterson
- Location: Ephraim, Utah, USA
Re: miscellaneous tips, advice, and cautions
Thank you D.W., Paul and Chuck. I am just finishing a pair that are probably ok to post.
I have had several failures crimping my full wellington's. I haven't quite accomplished the wrinkle removal every time. I beleive my boots are solid but they have never turned out to look like the real fine ones that are regularly posted. This is ok, and I am fine in my dumpy little world, and in my dumpy little shop. I don't get too upset with my (retarded ) progress with beauty. And after all, if all of us were "super stars" you finer boot and shoe makers wouldn't be special.
I really appreciate these postings as they make me (and us) better boot and shoe makers.
Best wishes,
Larry Peterson
-
jshepherd
- Posts: 8
- Joined: Fri Apr 02, 2010 9:00 am
- Full Name: John Shepherd
- Location: Nanaimo, BC, Canada
Re: miscellaneous tips, advice, and cautions
Working with patent leather - I have an order for a pair of stage shoes made of white patent leather.
I would appreciate any tips and suggestions on working with patent leather. Thank you.
John
I would appreciate any tips and suggestions on working with patent leather. Thank you.
John
-
dearbone
- 8
- Posts: 1032
- Joined: Fri Oct 12, 2007 12:23 pm
- Full Name: Nasser Vies
- Location: Toronto, Ontario, Canada
- Been Liked: 3 times
Re: miscellaneous tips, advice, and cautions
John,
The first thing that comes to my mind is "Be gentle with it" when lasting,there is always the risk of cracking the grain with hard pulling during lasting,wet the flesh side before lasting,it will help.
Nasser
The first thing that comes to my mind is "Be gentle with it" when lasting,there is always the risk of cracking the grain with hard pulling during lasting,wet the flesh side before lasting,it will help.
Nasser
-
jshepherd
- Posts: 8
- Joined: Fri Apr 02, 2010 9:00 am
- Full Name: John Shepherd
- Location: Nanaimo, BC, Canada
Re: miscellaneous tips, advice, and cautions
Hi Nasser,
Thanks for the tip. Some other issues I'm concerned about when working with patent leather are:
1. Sewing: Is a sewing machine needle specifically for patent leather recommended?
2. Any tips on keeping the upper clean throughout the shoe-making process? I was thinking of plastic-wrapping the uppers while finishing the bottoms.
Regards,
John
-
dearbone
- 8
- Posts: 1032
- Joined: Fri Oct 12, 2007 12:23 pm
- Full Name: Nasser Vies
- Location: Toronto, Ontario, Canada
- Been Liked: 3 times
Re: miscellaneous tips, advice, and cautions
You are welcome John,You can use a regular sewing machine needle for sewing patent leather,at least i have with no problem,you might want a tighter tension on the stitch than regular(none patent)leather.
Both cloth and plastic covering will work,use which ever you feel you can work with better,Plastic should work well here.
Nasser
Both cloth and plastic covering will work,use which ever you feel you can work with better,Plastic should work well here.
Nasser
-
artzend
- 7
- Posts: 519
- Joined: Sat Feb 10, 2007 10:00 am
- Full Name: Tim Skyrme
- Location: Agnes Water, Queensland, Australia
- Been Liked: 5 times
- Contact:
Re: miscellaneous tips, advice, and cautions
John
Patent cleans up easily because it is a polyurethane coating, so wiping marks off should be straightforward.
when lasting you will need to have a hairdryer handy, because you need to warm the patent so that it lasts properly. Don't heat it too much, but if you don't you will have all sorts of problems lasting the toe and seat.
Tim
www.shoemakingbook.com
-
dearbone
- 8
- Posts: 1032
- Joined: Fri Oct 12, 2007 12:23 pm
- Full Name: Nasser Vies
- Location: Toronto, Ontario, Canada
- Been Liked: 3 times
Re: miscellaneous tips, advice, and cautions
I have an order for an pair of elastic boot like the fitter you see,Now i have made elastic ankle boots with galosh vamp and vamp like in oxford shoes where the elastic can be sewn to the back(wings)almost with any sewing machine,but i had to struggle to sew the lining to top leather especially around the elastic with my cylinder(arm) machine and i don't think a post machine can do it well either,I tried many strategy trying to sew the elastic to the top leather in flat condition, without closing the back seam and i did that and the first row stitching were fine,but when i put the lining i need to close the back seam of top leather and that's when it get difficult to sew the ling especially around the elastic, I know not many of you here make this sort of shoes,but any tip that might save me sewing the lining by hand will be appreciated.
While I was crimping the front of this boot,The words of the master boot maker from Oregon ringing in my ears,saying if the wrinkles dry on the board,impossible to remove later and so true,Than i prepared new boards for the job.
Nasser
While I was crimping the front of this boot,The words of the master boot maker from Oregon ringing in my ears,saying if the wrinkles dry on the board,impossible to remove later and so true,Than i prepared new boards for the job.
Nasser
You do not have the required permissions to view the files attached to this post.
-
paul
- 8
- Posts: 1038
- Joined: Tue Mar 08, 2005 10:00 am
- Full Name: Paul Krause
- Location: Prescott, Arizona, USA
- Been Liked: 14 times
- Contact:
Re: miscellaneous tips, advice, and cautions
Nasser,
Thank you for posting this. I'm really looking forward to your presentation on the construction, if that's where you were going with this. I know I'd like to see your boards you're going to make.
I've only made one pair. And I have been unable to stop at three things I'd do differently everytime I look at them, not to mention wear them, which I do often.
But I will share what I did, and maybe you find some value in it.
Please ignore for now the length of the elastic, that's one of my "three". We can come back to that. I know, It cuts across the SH line, that's for sure, not good!
This is what I wanted to show you.
WHat you see here is where I inverted stitched only the lining, which had an extra margin applied in the pattern making process. Then the upper was glued close in and laced.
I'm sure your cylinder machine could stitch a tape to cover it, from your description of it. Or even a patcher. Al shared a great tip once to prepunch the holes on the tape with a flat bed, and then come back with a patcher to close it with a real nice straight line.
This approach to the lining was an "extrapulation" of DW's technique for stitched-in counters on his Packers.
I hope you find some value in this.
Peace brother,
Paul
You do not have the required permissions to view the files attached to this post.
-
dearbone
- 8
- Posts: 1032
- Joined: Fri Oct 12, 2007 12:23 pm
- Full Name: Nasser Vies
- Location: Toronto, Ontario, Canada
- Been Liked: 3 times
Re: miscellaneous tips, advice, and cautions
Paul,
Thank you, I was not going for a presentation of the construction,it is a mass produced shoe and this fellow wants a hand made version,which is a totally different ball game,I was seeking an answer to what kind of machine or technique do i need to sew the lining to the top mainly around the elastic because it is too long and narrow of a tube for me to do the sewing clean without pulling and pushing,trying to straighten the path of the stitch.On your sample i probably could have sewn it with my cylinder bed because the elastic is placed low to the feather which has some room there.
I was discussing this machine question with a leather worker nearby and he told me of an Italian machine he saw and described it as " A long post that narrows at the top to a thumb size and this post also swivels like the arm of the McKay machine.Almost like a fairy tale machine
Nasser